
Register an application
Registering your application in Microsoft Entra establishes a trust relationship between your app and the Microsoft identity platform. The trust is unidirectional. Your app trusts the Microsoft identity platform, and not the other way around. Once created, the application object can't be moved between different tenants.
Follow these steps to create the app registration:
Sign in to the Microsoft Entra admin center as at least an Application Developer.
If you have access to multiple tenants, use the Settings icon ![]() in the top menu to switch to the tenant in which you want to register the application.
in the top menu to switch to the tenant in which you want to register the application.
Browse to Entra ID > App registrations and select New registration.
Enter a meaningful Name for your app, for example DocPilotSharepoint. App users can see this name, and it can be changed at any time. You can have multiple app registrations with the same name.
Under Supported account types, specify who can use the application. We recommend you select Accounts in this organizational directory only for most applications. Refer to the table for more information on each option.
| Supported account types | Description |
|---|---|
| Accounts in this organizational directory only | For single-tenant apps for use only by users (or guests) in your tenant. |
| Accounts in any organizational directory | For multitenant apps and you want users in any Microsoft Entra tenant to be able to use your application. Ideal for software-as-a-service (SaaS) applications that you intend to provide to multiple organizations. |
| Accounts in any organizational directory and personal Microsoft accounts | For multitenant apps that support both organizational and personal Microsoft accounts (for example, Skype, Xbox, Live, Hotmail). |
| Personal Microsoft accounts | For apps used only by personal Microsoft accounts (for example, Skype, Xbox, Live, Hotmail). |
Select Register to complete the app registration.

The application's Overview page is displayed. Record the Application (client) ID, which uniquely identifies your application and is used in your application's code as part of validating the security tokens it receives from the Microsoft identity platform.

Now select Certificates & secrets in the menu and click + New client secret under the Client secrets (0) tab:
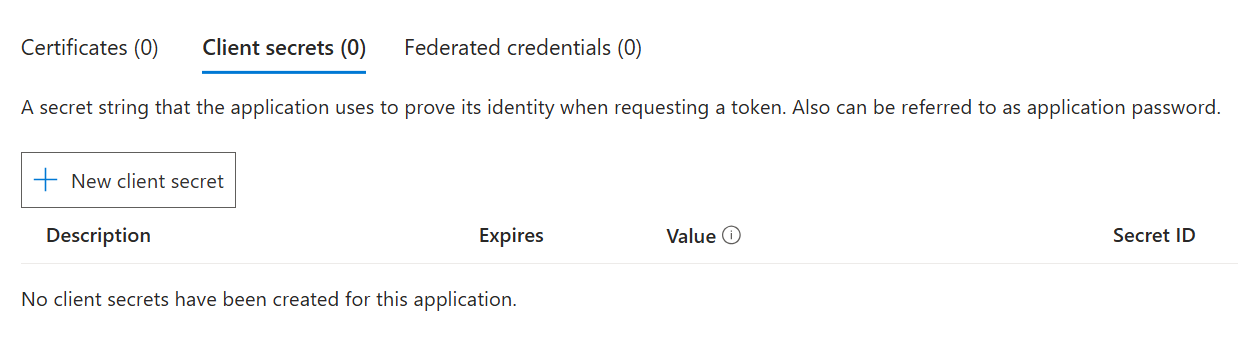
Give the secret a name and an expiration, and click Add.
Now you have a “secret” (that’s kind of a password), as soon as you navigate away from this page, the secret can no longer be read, so at this point, save it somewhere safe.
NOTICE: It’s the “Value” from the above list, not the “Secret ID” – This is the most common mistake people make in this entire process.

In the side menu, under Manage, select API Permissions
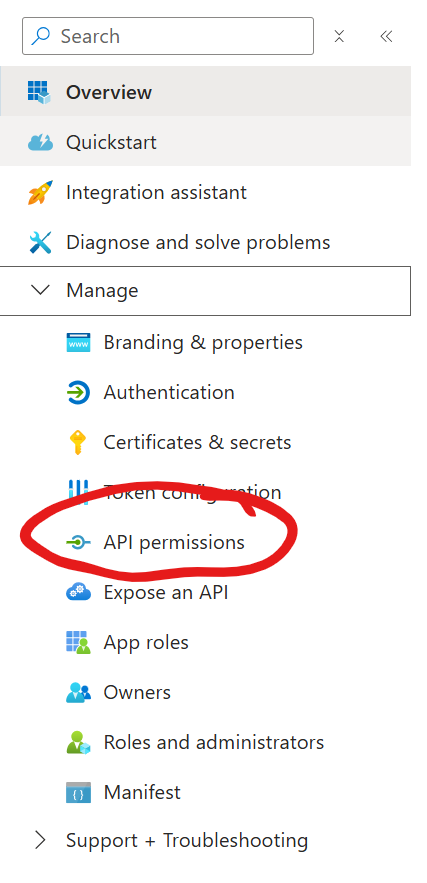
Click + Add a permission
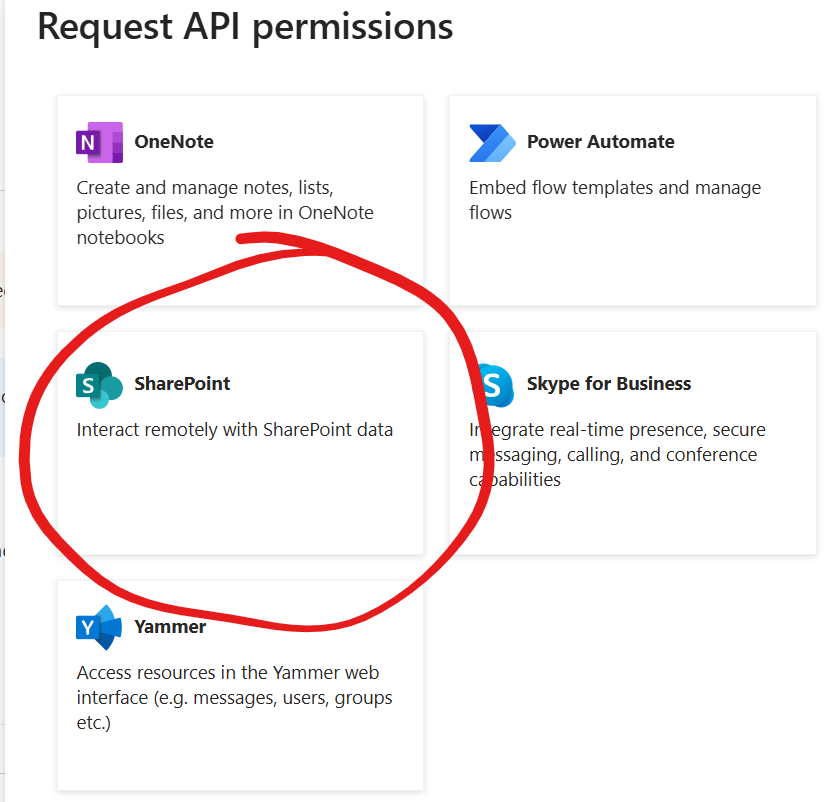
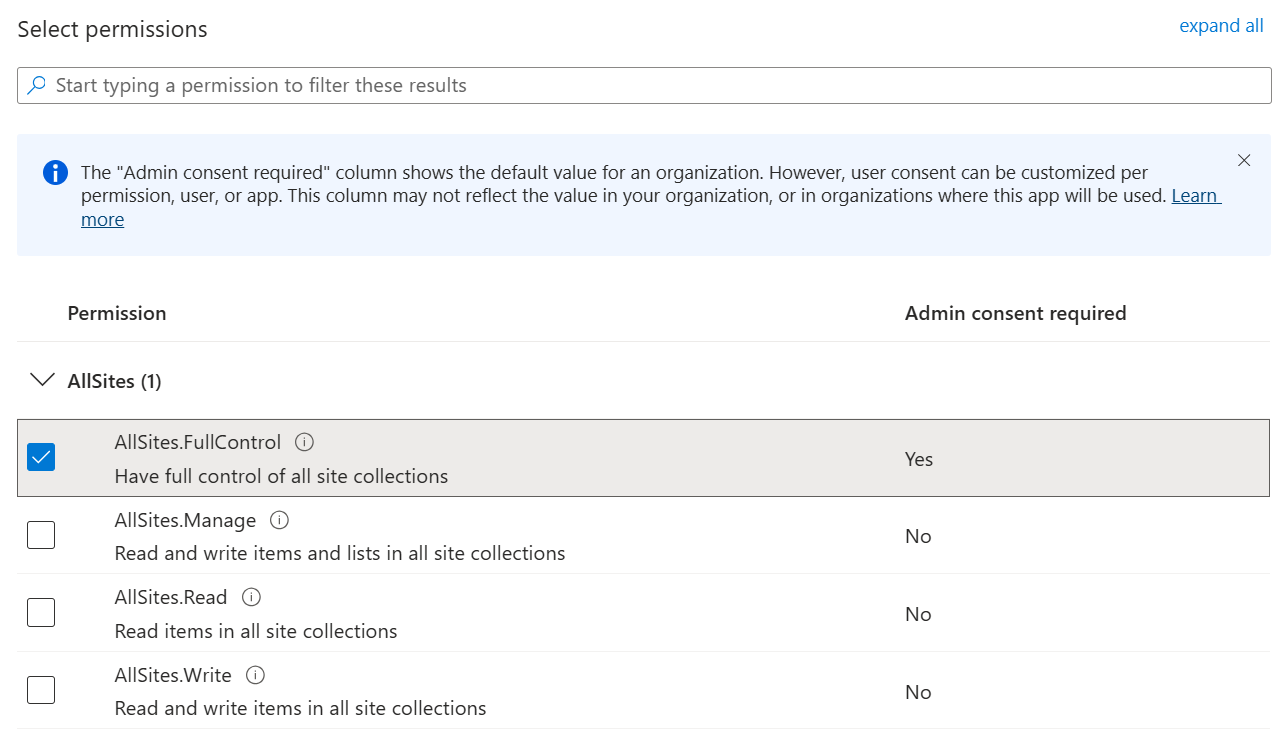
Select SharePoint from the long list of different Microsoft services
Now you have to options:
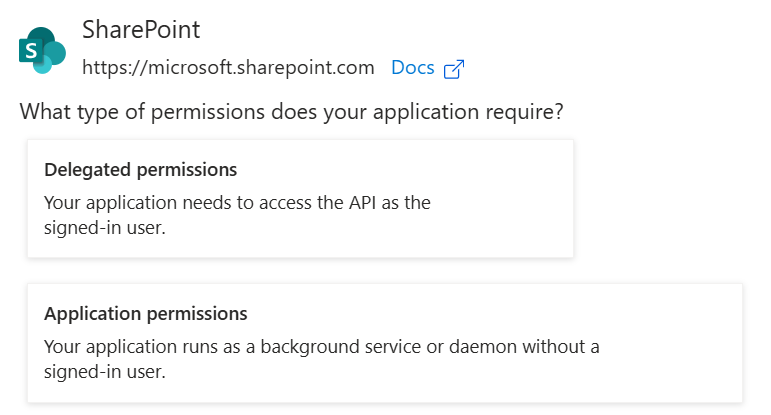
Select Delegated permissions if you’re creating a normal app registration for Proxy or Personal authentication. Select Application permissions if you’re creating certificate based authentication.
Select AllSites.FullControl
The permissions given here are not the permissions the users will receive; rather, it’s the maximum permissions that will be available if the user has matching permissions.
Click Add permissions to continue.
Now the permissions are added, but you (or an Administrator) need to consent to the permissions:

Click Gant admin consent for <tenant> to grant the consent.
After granting, you should have green check boxes